Recently, I was asked how to automate a process to request and approve external users having access to content inside an Office 365 Group. I am documenting an approach to solving this scenario using Microsoft's Cloud services in a series of blog posts. Each post will address part of the scenario from a different perspective and will discuss different technologies. The series contains the following posts:
- Overview of scenario and technologies
- Administrator - Configure tenant policies for groups and sharing
- End User - Make requests to add external users and monitor status
- Manager - Review and process requests (this post)
- Developer - Fill gaps in process via custom web service
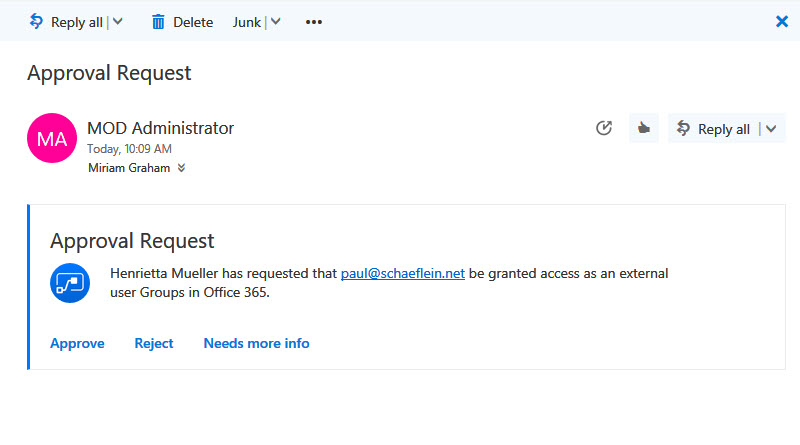
Receiving Approval Requests
Like most business process, notification of requests land in the approver's mailbox. Our flow (introduced in part 3) looks up the manager of the requester and sends an actionable email with information about the request.

Figure 1
Building the Flow
The trigger of the Flow is the creation of an item in the SharePoint list. This is a built-in trigger which requires the entry of a Site Url and selection of the list in the site. (Although not shown in the picture, the designer will query the site and show the existing lists.)
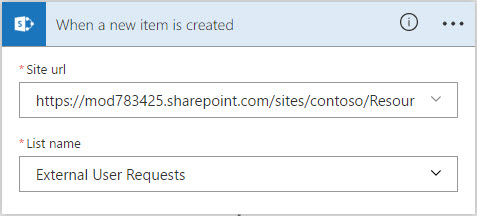
Figure 2
The first action will query Active Directory (AD) for the manager of the requester. "Get manager " is a built-in action that retrieves the correct property from AD. The action requires the email address of the user account to retrieve. The columns from the list item that triggers the flow are available as "dynamic content" in the designer. (Notice that the most used properties of User columns are included: Display Name, Picture, Email.)
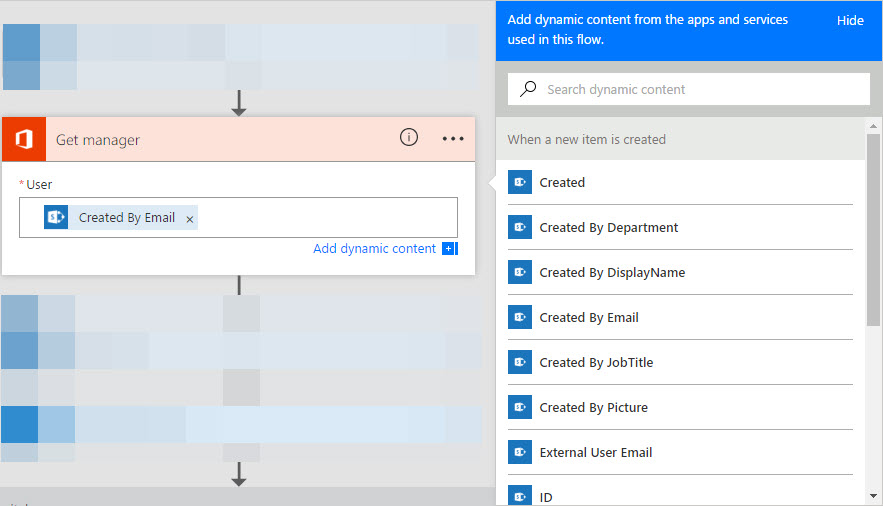
Figure 3
Although not strictly necessary, the Flow updates the status column of the list with the approver's name. (It seems that every business process has someone looking over it.) The "Update item" action will accomplish this. One peculiarity -- since the Title field of the list is required, we must provide a value in the action. (In our scenario, the Title field has been renamed External User Email.) Just as in the Flow trigger, we must type the Site url, then select the list. Simply selecting the dynamic content for the Id and External Email columns will suffice, along with the custom value for the status.
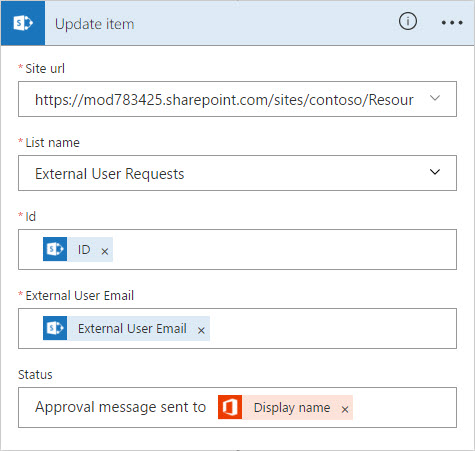
Figure 4
The same list of columns and properties are shown when editing the "Send approval email" action. This is equivalent to the variables capability in SharePoint Designer workflows, but the user experience is much better. The available properties are grouped by connection, and the connection has an icon that matches the action icon. Notice the email address in the "To" field has the Office 365 icon while the Created By DisplayName has the SharePoint icon. It is immediately clear the source of each property.
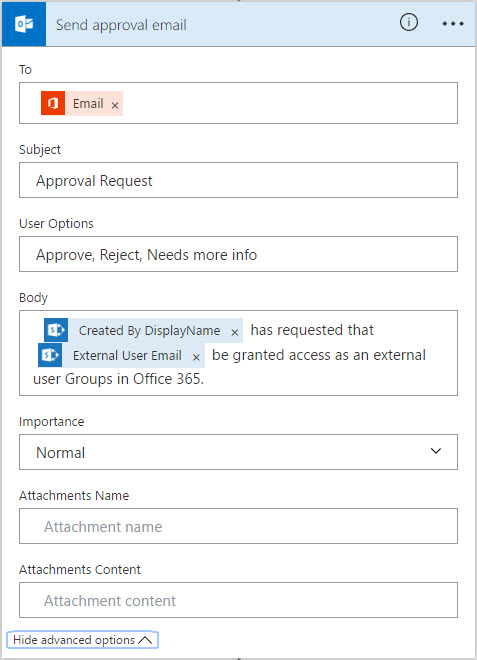
Figure 5
Note that the sender of the email (Figure 1) is the owner of the Connection to Outlook (Figure 6).

Figure 6
The built-in action for an approval email does not provide a form for capturing comments from the approver. Nor does the "Needs more info" link open a form. But it does provide a low-friction way for approvers to act on requests.
Waiting for and acting on input
We do not need to do any specific configuration or coding to make the workflow wait for a response to the email. The action defines a dynamic property for the Selected Action. Flow will automatically wait for the email recipient to click on one of the choices and will then set the value for that property and continue the flow.
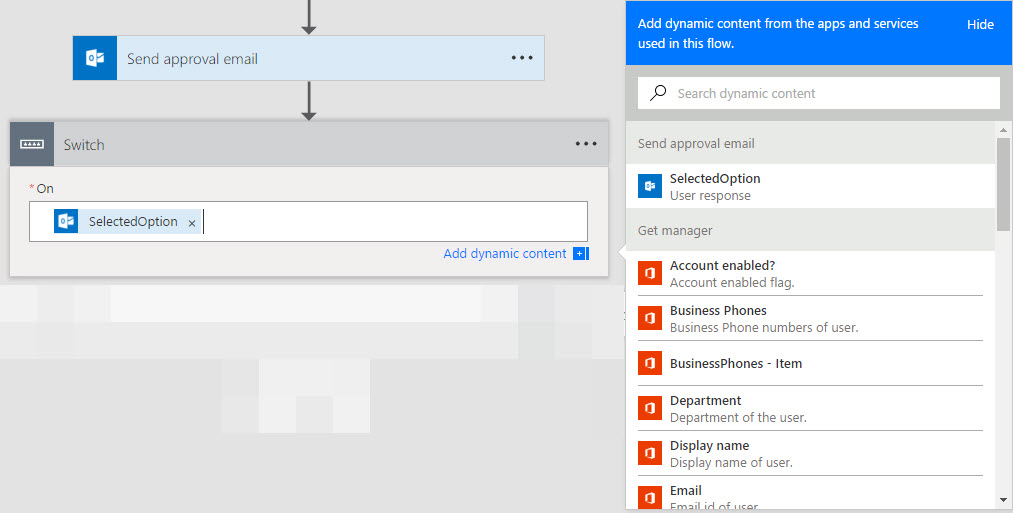
Figure 7
The "Switch case" action will route the Flow depending upon the value of the SelectedOption variable. There are three possible routes, matching the options displayed in the email. In all cases, an email is sent to the requester informing them of the approver's decision, and the status column of the list item is updated. In Part 5 of this series, we will discuss the creation of the External User account when the request is approved.
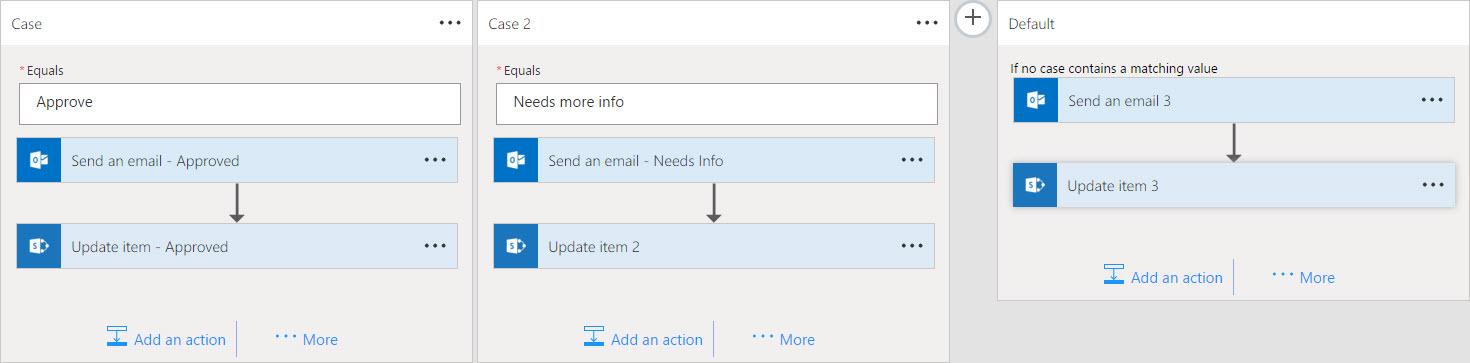
Figure 8
Summary
Using Flow is very similar to the SharePoint Designer workflows used in legacy deployments. The built-in conditions and actions address the vast majority of scenarios. To fill any gaps, custom code is required just as it was in the past. In the next part of this series, we will see how that is accomplished in Office 365.